Gary Slagel
NØSXX
A fellow ham, Andy Palm (N1KSN) also built this antenna
and also made some modifications. Some excellent photos and a few
details of the modifications can be found
here. Please take a look
to get more ideas on this antenna.
This is the 2nd antenna I designed specifically for operating from the
summits of mountains. Its lightweight, completely self
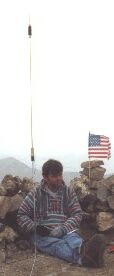 supporting
(no trees or guy lines required), works all bands, and sets up in 2 or 3
minutes. When
disassembled
supporting
(no trees or guy lines required), works all bands, and sets up in 2 or 3
minutes. When
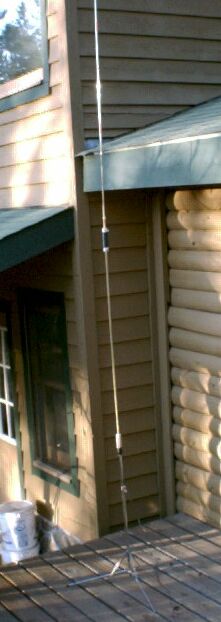
disassembled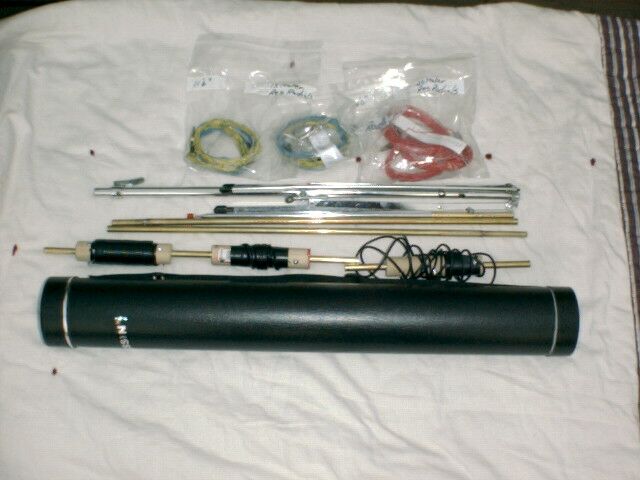 , it is a small package about
20" long and 2 1/2" in diameter ( depeding on what you come up with for a
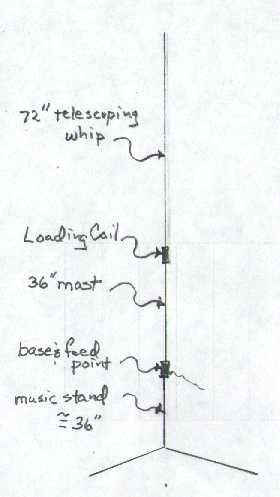
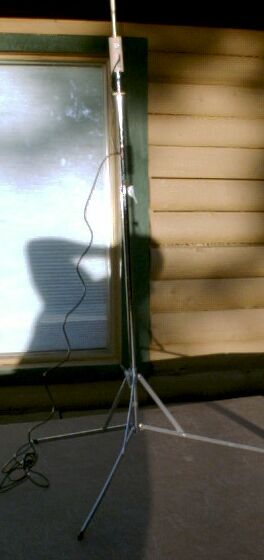
carrying case). When assembled, it is a 9 foot radiator consisting
of a 3 foot mast, a loading coil, and a 6 foot telescoping 'stinger'. The
antenna is supported by a tripod made from a music stand, the type used by
kids in high school band. The antenna has one coil for 20 & 17
meters, a coil each for 40, 30 and 15 meters, and 10 meters is tuned without
using a coil. All antenna pieces are made from two different sizes
of brass tubing which slide together to make a tight friction fit so that
no tools are required for assembly, pieces are simple pushed together.
Changing bands requries changing coils but that process is very, very
simple because of the way the pieces fit together. Fine tuning of the
antenna for SWR is done by adjusting the telescoping whip at the top of the
antenna. Radials are clipped to the antenna using aligator clips.
The tripod elevates the antenna to about 3 feet off the ground. This
gets the radials just far enough off of the ground that they act as resonant,
elevated radials and provide a pretty efficient ground plane with only a
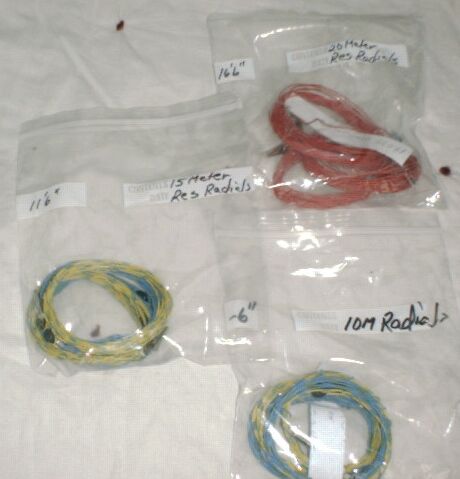
small number. My solution to radials is to cut four radials each for
40, 30, 20, 15 and 10. When I put the antenna up, if I intend to operate
only one band, I put all four radials for that band on. If I intend
to operate more then one band, I put two
, it is a small package about
20" long and 2 1/2" in diameter ( depeding on what you come up with for a
carrying case). When assembled, it is a 9 foot radiator consisting
of a 3 foot mast, a loading coil, and a 6 foot telescoping 'stinger'. The
antenna is supported by a tripod made from a music stand, the type used by
kids in high school band. The antenna has one coil for 20 & 17
meters, a coil each for 40, 30 and 15 meters, and 10 meters is tuned without
using a coil. All antenna pieces are made from two different sizes
of brass tubing which slide together to make a tight friction fit so that
no tools are required for assembly, pieces are simple pushed together.
Changing bands requries changing coils but that process is very, very
simple because of the way the pieces fit together. Fine tuning of the
antenna for SWR is done by adjusting the telescoping whip at the top of the
antenna. Radials are clipped to the antenna using aligator clips.
The tripod elevates the antenna to about 3 feet off the ground. This
gets the radials just far enough off of the ground that they act as resonant,
elevated radials and provide a pretty efficient ground plane with only a
small number. My solution to radials is to cut four radials each for
40, 30, 20, 15 and 10. When I put the antenna up, if I intend to operate
only one band, I put all four radials for that band on. If I intend
to operate more then one band, I put two
 radials on
for each band I intend to operate. I 'll go into more detail on how
I've built my radials below. Performance seems to be excellent on the
upper bands, 20 and higher. On 40 and 30 it is definitely a compromise
antenna because it is short and because the radials are not as elevated in
relation to the wavelength.
radials on
for each band I intend to operate. I 'll go into more detail on how
I've built my radials below. Performance seems to be excellent on the
upper bands, 20 and higher. On 40 and 30 it is definitely a compromise
antenna because it is short and because the radials are not as elevated in
relation to the wavelength.
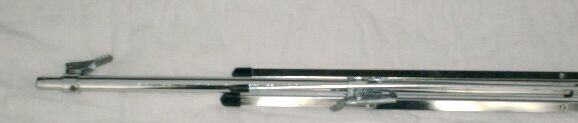
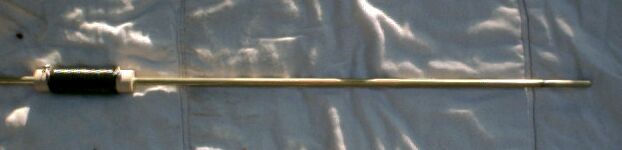
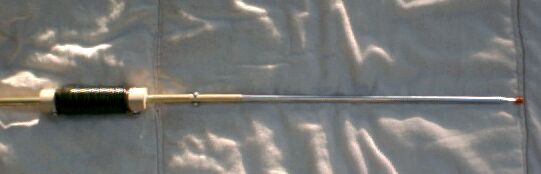
The antenna is composed of the following pieces:
tripod, base mount &
feed point, 3 foot mast (made of 2 18" brass tubes),
loading coil(s), 6 ' stinger.
See figure 1 for layout.
The project started with a music stand that
I picked up at the flea market for 50 cents... I knew I could turn that baby
into an antenna! Shortly after I discovered a rack of 3' brass tubes,
in a variety of small sizes, at the local hardware store. Amazingly,
each of the different sizes telescoped very snugly into the sizes above and
below it (amazing because its indeed seldom that things go right at the hardware
store for the antenna homebrewer). I've seen this tubing at a couple
of small hardware stores since then so I think if you check a few stores
you can find it. I found it at a local Ace hardware and a
 local True
Value. It is made by K & S engineering and the rack will say so.
The tubes are 3' long and vary in diameter from about 1/8" to 1/2".
I've found a place on-line that sells something similar but you have
to buy it in packs of 5 tubes. Anyway... I got 3 tubes, 2 of them 5/16"
and 2 11/32". These sizes telescope perfectly. The idea is that
all parts of the antenna (base, mast, coil and stinger) have a 11/32" top
and a 5/16" bottom and can all be simply pushed together when it time to
build the antenna. No screws... no nothing to fasten together.
local True
Value. It is made by K & S engineering and the rack will say so.
The tubes are 3' long and vary in diameter from about 1/8" to 1/2".
I've found a place on-line that sells something similar but you have
to buy it in packs of 5 tubes. Anyway... I got 3 tubes, 2 of them 5/16"
and 2 11/32". These sizes telescope perfectly. The idea is that
all parts of the antenna (base, mast, coil and stinger) have a 11/32" top
and a 5/16" bottom and can all be simply pushed together when it time to
build the antenna. No screws... no nothing to fasten together.
Once you find the music stand and the brass rods, the rest is easy.
Here's the parts needed(and estimated coststo buy new):
-
2 - 5/16" K&S engineering brass tubes ( $8)
-
1 - 11/32" K&S engineering brass tube ($4)
-
1 - 1" hardwood dowel (2 or 3 foot) ($4)
-
1 - 6' radio shack telescoping antenna (part# ) ($5)
-
bunch of #14 building wire (depends on how many loading coils you want to
build) ($5)
-
12 - 1 1/4" x #6 machine screws with 2 nuts ($1.20)
-
2- 1/2" x #6 machine screws with 1 nut (.20)
-
2 - 2" x #6 machines screws with nuts (.20)
-
stuff for radials (see description below)
-
6 to 10 feet of coax with a bnc on one end. I used the mini coax to
make it more compact. Yep I know its got lotsa loss but not much in
only 6 feet!
-
music stand ($who knows)
-
TOTAL COST: $27.60
Here's the tools needed
-
Drill (I used a drill press but I THINK I could have done it with a hand
drill. Possibility the antenna would have look a little crooked when
assembed hihi)
-
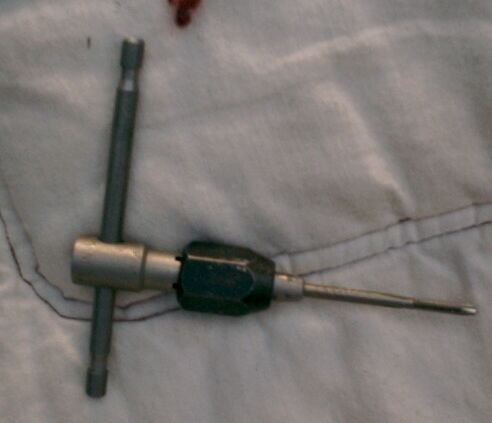
Tap for #6 screws (probably $10 if you don't have one)
-
Drill bits (5/16", 11/32" and 7/64"... the 7/64" is used for drilling the
hole for the tap for the #6 screw. Work with your hardware store guy
to make sure this is the right size)
-
Screw Drivers and Pliers
-
Propane torch (optional & $15 if you need to buy one)
-
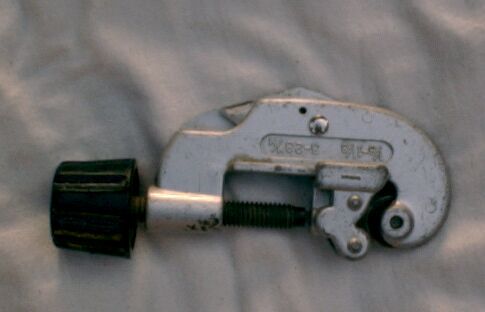
Tubing cutter ($5 if you need to buy one)
-
Some kind of saw for the dowel
Heres the instructions to build this thing:
-
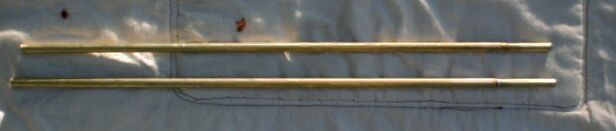
Build the 3' mast. It is made of
2 18" telescoping pieces.
-
Cut one of the larger (11/32") tubes in to 2 - 18" pieces
-
Cut 2 - 4" pieces from the smaller (5/16" tubes)
-
The 18" pieces will probably need to be reemed out on the end that was cut
so that the smaller tubes will slide in to the end. If this is necessary,
the tubing cutter usually will have a reeming tool
built in to the cutter. It is simply a triangular shaped piece
of metal designed to scrape the inside of the tube to enlarge it.
-
Now fasten one of the smaller 4" tubes inside the larger tubes at a depth
of about 2". I did this by soldering the small tube into the large
with the propane torch. This is done just like a plumber 'sweating'
a fitting on to copper pipe. Put a little soldering paste on the little
tube before sliding it in. Then, heat the larger tube with the torch
and after it has had a good chance to warm up touch some solder to the joint.
If all goes well, the solder will melt and be sucked right into the
seam. Another way that is just as good as soldering, is to drill a
hole thru the tubes for a #6 machine screw and fasten them together with
1/2" by #6 screw. If you elect this method add 2 screws and nuts per
coil to the parts list.
-
Slide the two 18" pieces together to make your 3' mast.
-
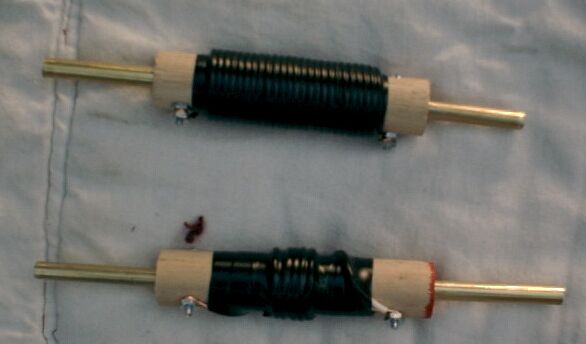
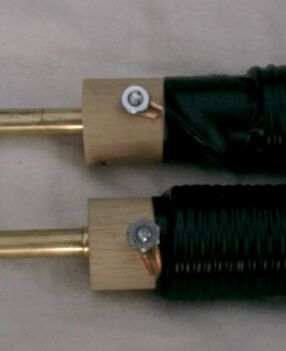
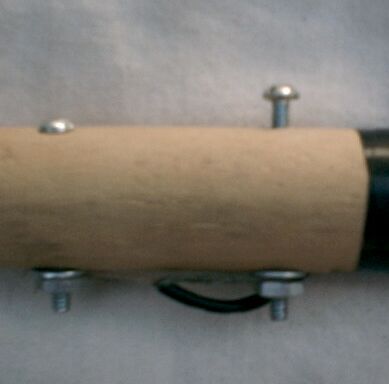
Build one or more coils. A coil is made of a
4 1/2" piece of dowel with a piece of 11/32" tube attached to one end and
a piece of 5/16" tube attached to the other end.
1 1/4" screws are run through the dowel and
into the brass pieces. Wire is coiled around the dowel and attached
to the screws to form the electrical part of the loading coil.
-
Cut one ore more 4 1/2" pieces from the 1" dowel, one for each coil
-
Drill a 5/16" hole in one end of the dowel about 2" deep, make sure its as
straight as you can make it. I used a drill press and eye balled it
and was ble to get these holes pretty straight. I think you can use
a hand drill but its possible the antenna will look a little off kelter when
its assembled.
-
Drill a 11/32" hole in the other end of the down about 2" deep
-
Cut a 4" piece from the 11/32" tube and a 4" piece from the 5/16" tube.
Reem out the 11/32" tube so that it will accept a smaller tube in the
end.
-
Stick the two 4" pieces into the ends of the dowel
-
Drill a 7/64" hole through the dowel and the brass rod at each end
-
Use the #6 tap and put threads in the just drilled holes. If you've
never done this its very simple, just screw the tap into the hole and it
will cut threads as it goes.
-
Screw a 1 1/4" machine screw through each hole and put two nuts on the end.
Don't tighten the nuts too hard on the screw. I had one coil
actually loose the connection to the brass rod after I had screwed it too
tight. After that experience, I've always been scared that one of my
coils would suddenly loose electrical connection with the brass tube but
its never happened to me. None the less, I'd be more comfortable with
a better way of making this connection. In the mean time, this method
has not failed me yet!
-
Coil #14 wire on the dowel as per the following chart for different coils
(I've made coils for 30 & 40 also but ended up using very light (#22)
wire and am not terrible happy with them. If I had used #14 wire I
would have needed longer coil forms (dowels) and I'm afraid the weight would
be too much for the antenna. I plan to experiment more with this and
hopefully I'll add more coil data later) You may want to add one turn.
if the coil is slightly too large, its easy to tune the antenna by shortening
the whip. Experimentation is the best way to find what you like:
| 10 meters |
No coil needed |
| 15 meters |
6 turns |
| 20 & 17 meters |
25 turns |
-
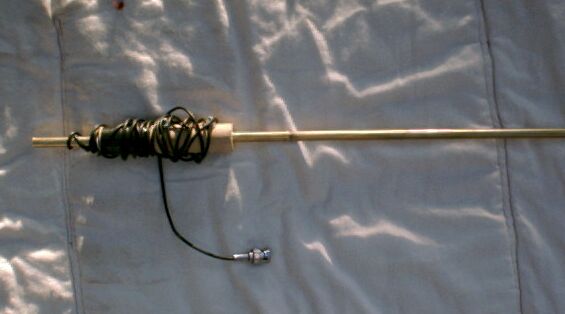
Tie the wire ends to the bolts on the coil form.
-
Wait until after you have tuned the antenna to wrap the coils with electrical
tape. The tape will hold the coils securely in place but you may need
to adjust the coils during tuning so its best not to wrap them with tape
yet!
-
Push the coil onto the 3' mast
-
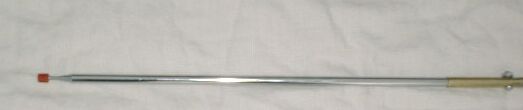
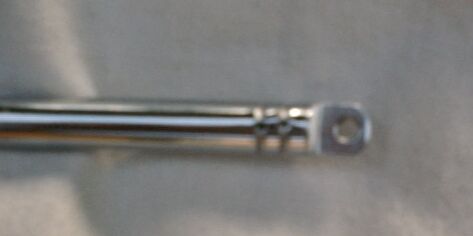
Build the 6' stinger. The telescoping mast
needs a piece of 5/16" tubing attached so
that it will slide into the top of the coil.
-
Cut a 4" piece from the 5/16" brass tube
-
Drill a 7/64" hole down the brass tube and the tap the hole to create threads
for a #6 bolt
-
The telescoping mast will have a hole slightly smaller
then 7/64" in the end. Drill that hole out to 7/64" and tap it
to create threads.
-
Now you should be able to thread a #6 screw through the tube and into the
threaded hole in the telescoping mast
-
Push the stinger into the top of the loading
coil
-
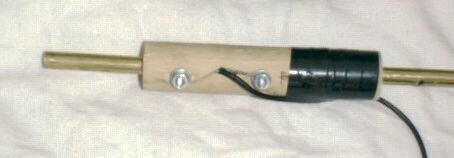
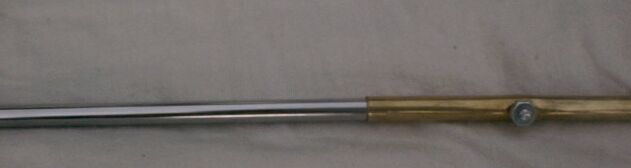
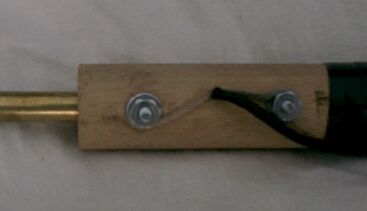
Build the base. The base is constructed
to accept the 5/16" tube from the 3' mast on the upper side. The lower
end of the base will depend on your tripod (music stand). I put another
piece of 5/16" tubing on the bottom of the base and it slid into the tripod.
The base also has 2 bolts that are used to
attach the feedline and radials to.
-
Cut a 4" piece from the 11/32" tube and reem it out so it will accept a 5/16"
tube
-
Cut a 6" piece from the 1" dowel
-
Drill an 11/32" hole about 2" deep into the 6" dowel piece
-
Push the 4" brass tube into the just drilled hole
-
Figure out how you will mount the base to the tripod. I inserted another
piece of 5/16" tubing into the bottom of the base and this was a perfect
size to slip into the telescoping portion of the music stand. You might
want to just drill the hole the appropriate size for sliding over the top
of the music stand.
-
Drill a 7/64" hole about 1" from the end of the dowel that contains the brass
tube so that it goes through the brass tube.
-
Drill another 7/64" hole far enough from the other end so that it DOESN"T
go through the hole you drilled for the tripod to slip into. You don't
want the bolt that goes in this hole to make electrical contact with the
tripod.
-
Tap both of the 7/64" holes for a #6 bolt and insert the bolts
-
Attach the middle of your coax to the upper bolt and the shield to the lower
bolt. I arranged the lower bolt so it would
stick out a little on both sides. This makes it easier to attach
radials.
-
Securely tape the coax to the dowel with electrical tape. This acts
as tension relief for the coax so the leads won't break off.
-
Slide the mast onto the base
-
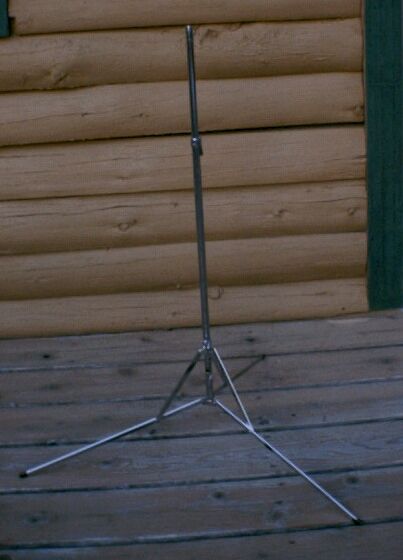
Prepare the tripod. I had to cut the top off
of the tripod mast because it was bent. I also had to modify the tripod
a little so that it spread out a little farther then the standard music stand.
This stuff will depend on the music stand you end up with.
-
Mount the base to the tripod
-
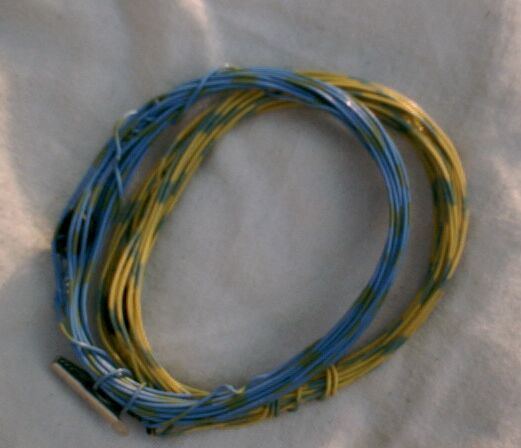
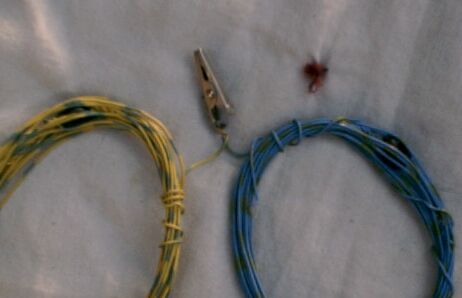
Construct radials. I have cut 4 radials for
each band I'm interested in. I use very lightweight (#22) solid wire
that I happened to get a hot deal on at the flea market. I think you
can buy the same wire cheap at the hardware store. It comes as 2 wire
twisted pair but is easy to untwist. I really like sold wire because
its easy to roll up and holds in a coil
without having to wind it on something and/or having wire ties to hold
it in place. I use small rubber grommets for
insulators (sorry about that picture) and attach a 3' piece of wire on
the end of the radial. This helps keep the radial itself from touching
the ground. This is pretty important in order to maintain a consistent
SWR every time you put it up. If you're on a mountain where you can't drive
a stake, just find a small rock and wrap the end of the wire around it to
hold it in place. I attach two radials
to one alligator clip. If I'm expecting to work just one band,
I attach all four radials for that band. If I expect to work more then
one band, I attach two radials for each band I'll be using.
-
Attach the radials and you're ready to tune the antenna.
-
I found that the coils sizes listed in the table above made the antenna resonant
on 10/15/20 with the telescoping whip fully extended which is very convenient.
For 17 meters, I used the 20 meter coil and shortened the whip by 2'8".
For 10 meters, use no coil and shorten the whip by 6". In the
field, its easy to adjust the whip because each section is 12". If
you need to reduce by 6", just push one section half way in.
-
Since the whip can only be shortened, not lengthened, you may want to make
the coils in the table above 1 turn more then my recommendation. That
way you have a better chance of the antenna being able to be tuned by shortening
the whip.
-
If you don't have an antenna analyzer and need some help tuning the antenna
using your transceiver and an swr meter, send me an email ([email protected])
and I'll give you a description of how to do it.